Friday, January 20, 2012

The Travelman pickup (or is that the Flying Dutchman?)

On Jan 19 2012 Dad & the boys set out for Melbourne with the car trailer behind the Forrester. They picked me up in Melbourne and we all headed out to Melton to pick up the new car. We spent the 20th driving home - 10 hours each way!
Donnybrook, Vic

Wednesday, May 18, 2011

Update post: Transporting for storage

On January 27 2011 we transported Vanman from the shed to my garage for storage while Dad was away. We got to drive it outside for the first time which was pretty amazing. What's left to do? Interior and glass!


We left it wrapped in bubble wrap to protect it in storage.


It even fits sideways in my garage!

Update post: Re-assembly

From December 28 2010 through to the end of January 2011 we worked on putting Vanman back together. More shots and video fottage of getting the motor running are coming...

First part on...

The motor is in...

Tuesday, May 17, 2011

Update post: Transporting the shell

Just after xmas (December 27) we transported the shell back to the shed to start the rebuild...

Update post: Exterior painted

On December 20, 2010 the boys and I got to see the exterior paint job for the first time - looking amazing...


Monday, May 16, 2011

New acquisition - TravelMan!

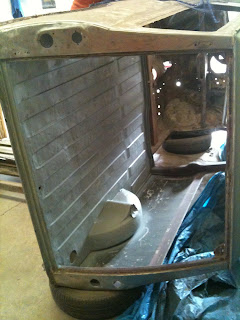
Great news - we got another van on eBay last week. It's not in great condition but it's a rare find - a van with sliding back & front windows + a backseat. The compliance plate shows that it was a van, and it's serial number is #725 - given that BMC started the numbering at #501 this means that it was probably built in the first month of production in 1964 (according to this great article from the Mini Experience). We thought that this was a Traveller, but Craig Watson from Mini Experience let us know that they didn't make any factory Travellers in Australia, so it's most likely a dealer fitted modification - more detail when we pick it up and get it home.

The lichen is a good look!


Thursday, December 9, 2010

Interior painted!

We dropped down to the spray shop today - the inside of the car has been sprayed and it looks amazing. The inside of the doors are also sprayed. Matt from the spray shop took some photos during the spray process - he's going to send them through later.

The outside of the car is primed and rubbed back - it looks fantastic.


Rear sill

Engine bay

Driver's side door jam


The exterior was all set to be sprayed earlier this week (on Monday), until this happened to the primer on the bonnet - it just started peeling off. The paint supplier was called in - they came to look at the damage today and have taken some samples back to Sydney. Matt is going to re-prime the bonnet, then hang the doors and do the big spray!

Sunday, November 21, 2010

Paint on the bonnet!

We got to see a sample spray of the underside of the bonnet this afternoon. The colour looks amazing - nice & sparkly! Now the full load of paint will be orders for application over the next week or two.


Saturday, November 20, 2010

Engine work

While the shell has been in the body shop Dad's been doing a lot of work on the engine rebuild. There are lots more shots coming that I'll add when I get them.

Here's one when it was all assembled with the gearbox attached. Looking mighty impressive!


Primed and masked up

The car is looking good at the spray shop. We dropped in about a fortnight after we too these shots and it was all rubbed down inside - hopefully the next shot is a sample spray on the underside of the bonnet.


Thursday, November 18, 2010

Transporting to the Paintshop

On August 9 2010 we loaded te shell onto my trailer and moved it to the spray shop - thanks for the help Denis!


Finally painting - undercoat

Next step was to get some undercoat onto the shell...


Wednesday, November 17, 2010

Learning to weld!

In late June / early July Dad learnt to weld and made some great progress. The animation below shows how we assembled the the front-end using the subframe as a reference...


Rolling the shell over again


Underside of the bonnet


We spot welded the the A frame back in - looking good!